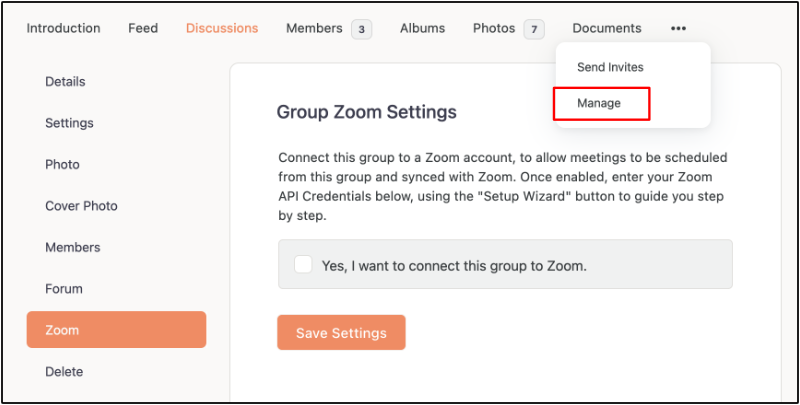
In this tutorial, you will learn how to connect a Zoom account with your community, so you can schedule and view meetings and recordings in social groups. Group organizers can connect their zoom account to social groups and start scheduling meetings.
As a group organizer, go to a group’s page and then click the Manage > Zoom tab. In the Group Zoom Settings heading, mark the checkbox to connect a Zoom account. This will reveal the Authentication form that will need to be filled out, as well as a Group Permissions settings tab.

In the Zoom API Credentials heading, click the Setup Wizard button for step by step instruction for creating the app from your Zoom account. Once you complete the wizard you should have all the information to enter the Zoom API Key, Zoom API Secret, Zoom Account Email, and Verification token for the app that you created from your Zoom Account page.
Click the Save Settings button.
In the Group Permissions heading, select the members who are allowed to create, edit and delete Zoom meetings. However, you cannot have multiple zoom meetings under the same host seat at the same time, including between different groups. To get around this constraint, you can either add additional host seats to your zoom account or create multiple zoom accounts.
Upon successful configuration, a Zoom tab is added to the group. You can create new Zoom meetings, view upcoming meetings and also view past meetings within the Zoom tab. When a zoom meeting is scheduled in a group, a notification will be posted in the groups activity feed with a date and countdown marker.
NOTE: The Zoom tab respects the privacy settings of the group.


