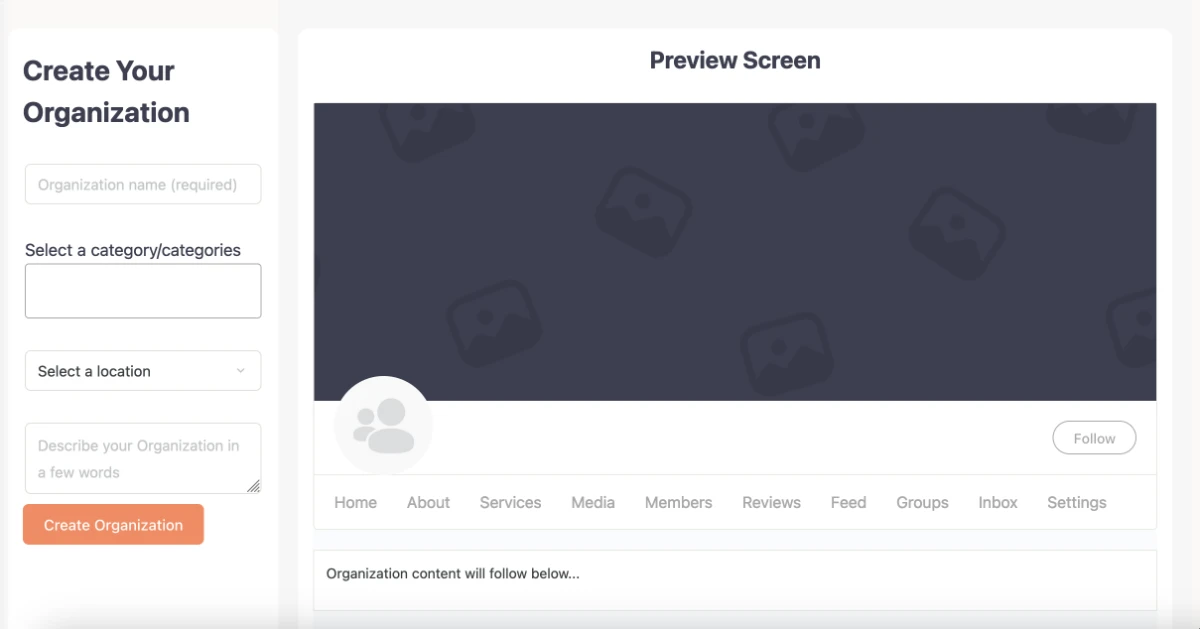
All Organizations are created on the Create An Organization page. You can also reach this page by navigating to the Organizational Directory Search page. On a desktop, you will see a Preview, showing what your new Organization Listing might look like. We therefore recommend creating new Organization Listings on a desktop.

Unsurprisingly, the first thing to consider is your Organization’s title, which will also be used as your listings URL path and for tagging your organization in the community, i.e. @my-org. We recommend you keep this short and simple.
Next, choose a category. Categories aren’t mandatory, but they do help users to better locate or determine what the organization might relate to.
Then, write a description. What is the organization’s mission statement? What does the organization stand for? As you enter these, the preview will automatically update.
If you are happy with the information you’ve entered, go ahead and click ‘Create Organization‘. Congratulations! Your new Organization Listing is now live
Adding Images #
Next, you can add a profile picture and a cover image straight away. You can skip this step by simply clicking on ‘Visit Organization‘ and add these images later.
Click on either of the two grey boxes to display an uploader. All the standard image formats are accepted, but we recommend webp.
Once you’ve added your images, the preview will again update in real-time, so you can see how your Organization will look. If you are happy with your images, go ahead and click ‘Save‘. Finally, click ‘Visit Organization‘ to see your new listing.


